
Authors: Joseph Snyder, Sam Habiel
License:
The following instructions were adapted from Nancy Anthracite's document entitled InstallingVistAWithSingleUserVersionCache5.2, which was created to guide a user through installing InterSystems Caché onto a Windows operating system. The instructions were using an older version of Caché; this uses the Caché 2015 version and the and shows the updated Management Portal interface.
Trial versions of the Caché installer can be downloaded from
This installation guide uses Caché 2011.1, it should also apply for Cache 2013 to 2016. If you already have a Caché installation and are looking to install VistA as an additional database, you do not have to re-install Caché. Please use your existing installation and pick up the instructions at the point where the folder is created within the mgr folder.
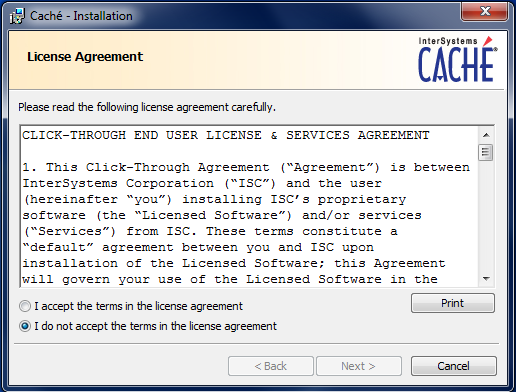
Download the Caché installer from the above link and double click on the downloaded .exe file. The first window that requires interaction is the Licensing Agreement shown in the figure below. Agree to the license in order to continue in the installation process.
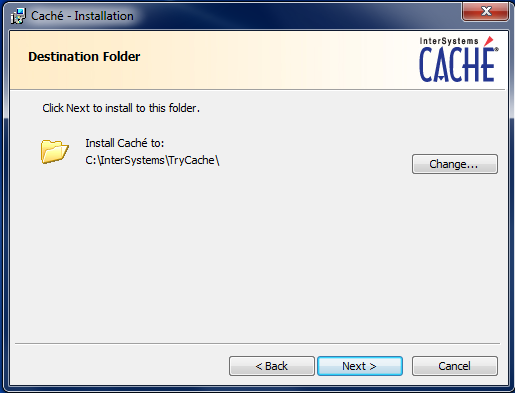
The next window asks to set the directory in which Caché will be installed. Most users will be able to accept the default path. If more than one instance is found on the machine, the next instances will be denoted with a number appended to the end of the instance name.
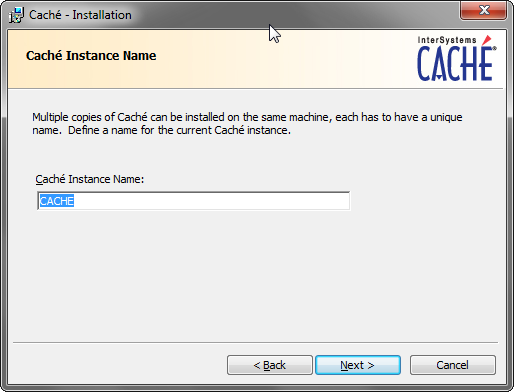
The following dialog will show if you are installing the production version of Caché: You can have several instances of Caché on your machine; each instance can hold several namespaces.
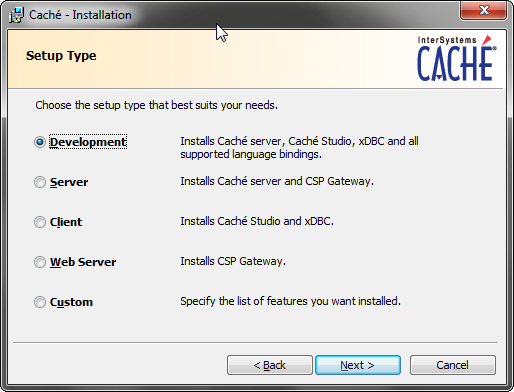
The following dialog will show if you are installing the production version of Caché: you can install different components.
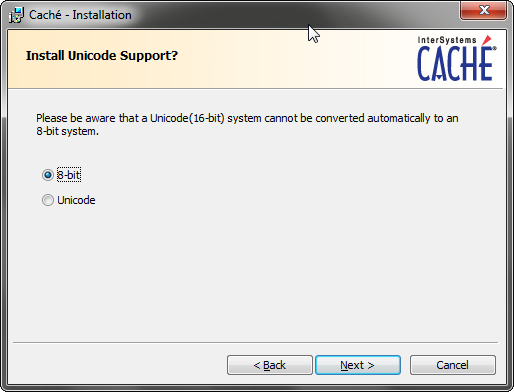
The following dialog will show if you are installing the production version of Caché: you can install the Unicode version of Cache. For VistA, you do not need to do that. Due to the fact that there is no way to switch between versions of Caché (ASCII vs Unicode), and most CACHE.DATs in the United States are distributed in ASCII mode, you should install the ASCII version. (On GT.M, you can dynamically switch between ASCII and UTF-8 mode.)
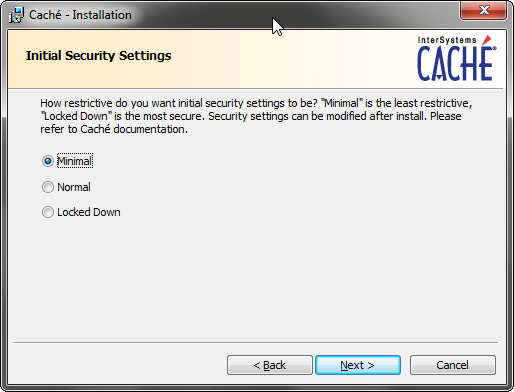
The following dialog will show if you are installing the production version of Caché: You can decide what security settings to start with. If you are just trying VistA, you should choose the least secure settings.
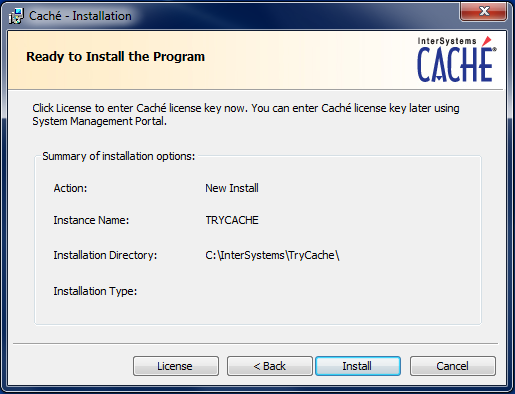
Once the install directory is set, the installer will display a summary of the instance that will be installed in the process. There is the option to enter a license if you have one, but this is not a required step for the current testing configuration.
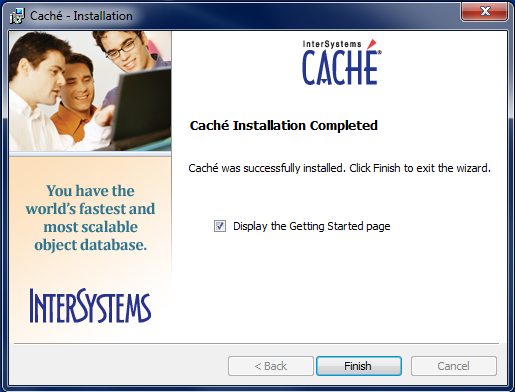
After the installation has finished, the completion screen is shown.
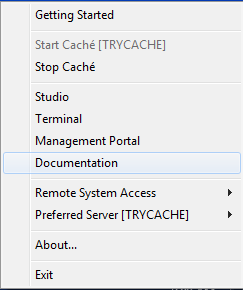
The first sign of a correctly installed and running instance of Caché is the Caché Cube in the taskbar, like below.

Clicking on the Cube will open a menu that displays the options to interact with the Caché database.
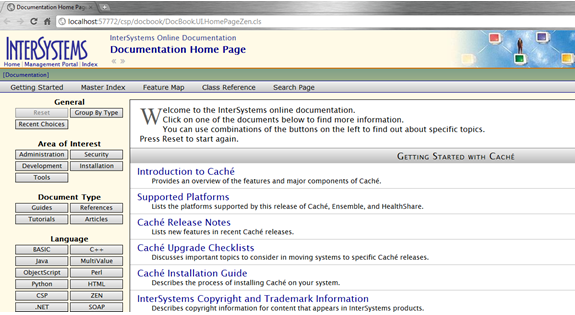
The next test to ensure that your Caché instance is working is to open the documentation. This will bring up the documentation home page in your default web browser.
On Mac OS X, there is a graphical installer based on downloading a .dmg opening it, and then running the .pkg file. On Linux, it is a text based installer. In either case, you should follow the instructions found on Intersystems' website.
Once Caché is installed, it is time to create the proper folders and environment to run the VistA instance within Caché. The first step is to go to the mgr folder of Caché and create a new folder as shown below. This folder will hold the database file cache.dat that will contain the VistA routines and globals. In reality, the folder can be anywhere on your system; it doesn't have to be with the other databases Caché supplies.
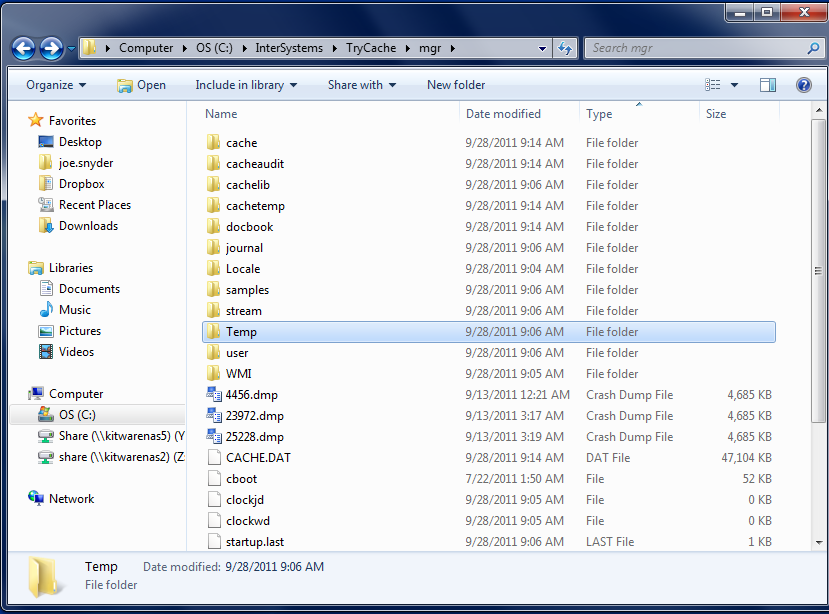
As an example, the folder has been given the name "VistA."

At this point we are ready to stand up the VistA instance. Right click on the Caché cube and select Management Portal of Caché. On macOS and on Linux, the URL is http://localhost:57772/csp/sys/UtilHome.csp.

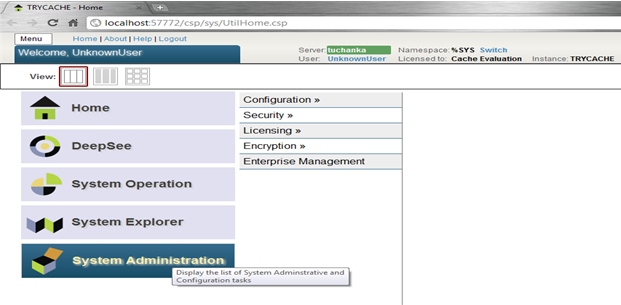
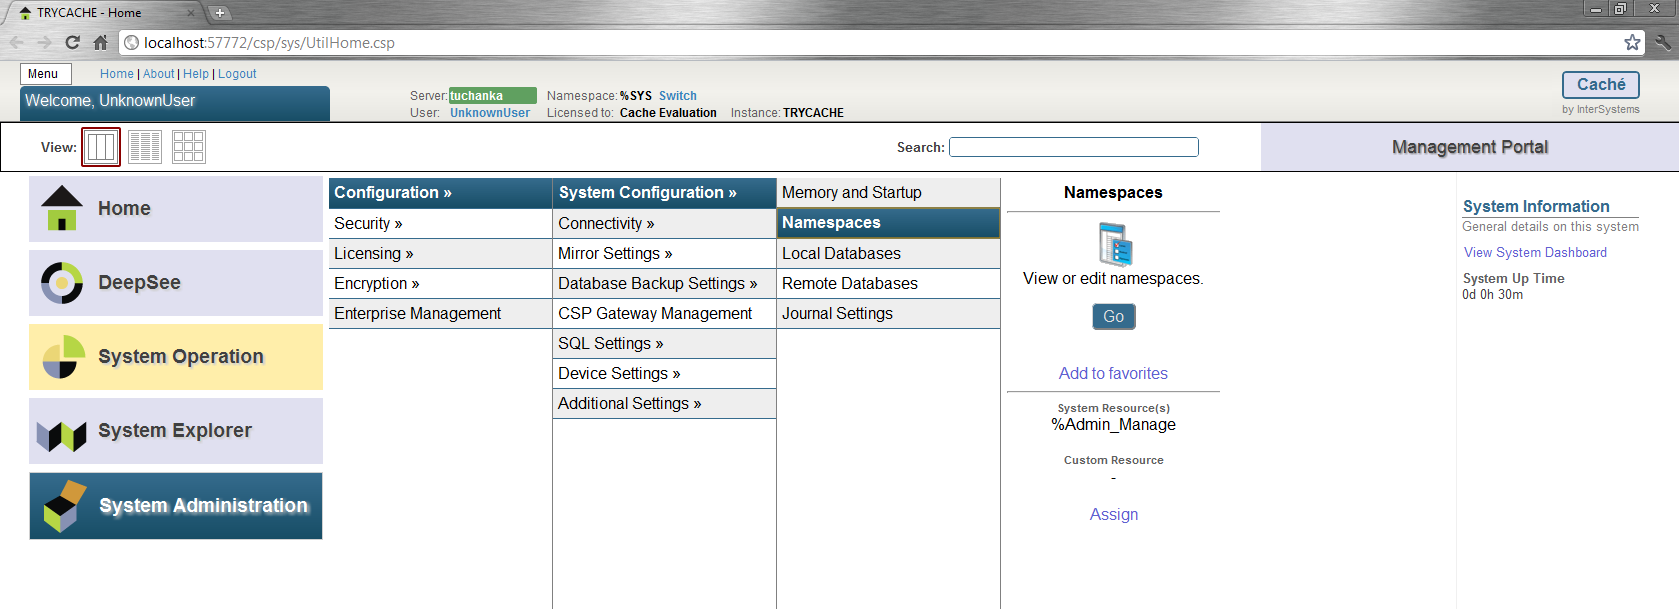
This link will open a Management Portal web page. Click on System Administration to show administrative options.
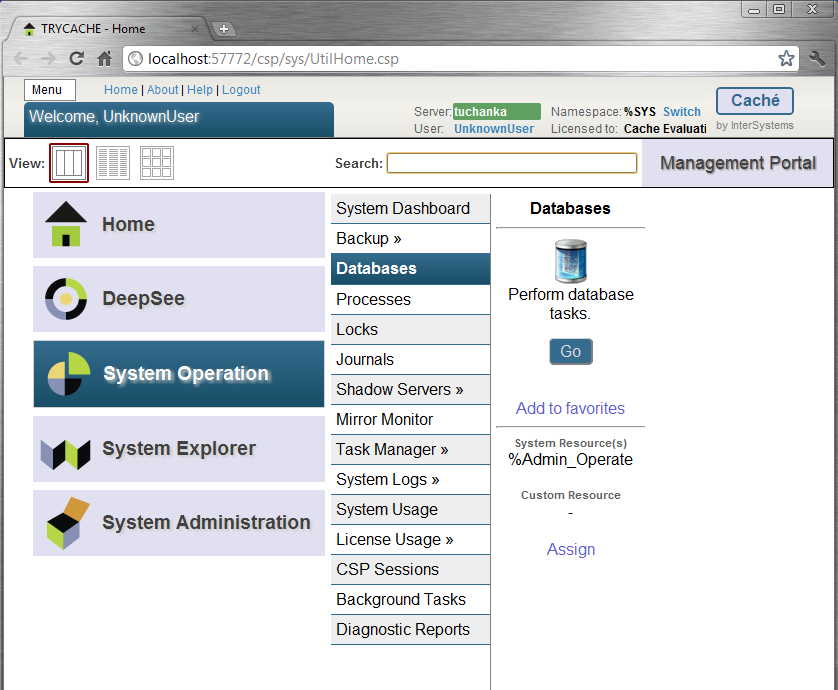
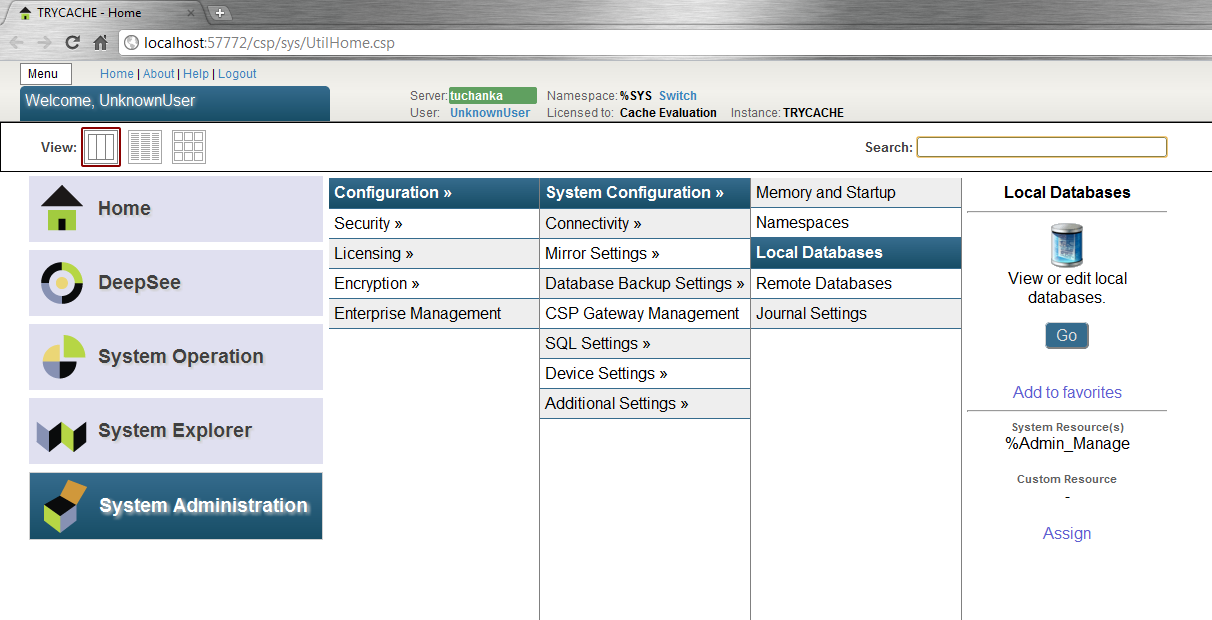
System Administration shows those options that can be used to change the Caché system. Our goal is to use the Configuration function to create and initialize an empty database that can then be filled with the VistA routines and globals. Starting from System Administration page of Management Portal:
Click on Configuration, System Configuration, and Local Databases to arrive at System Configuration menu. Create the database by clicking on the Local Databases tab and then selecting Go.
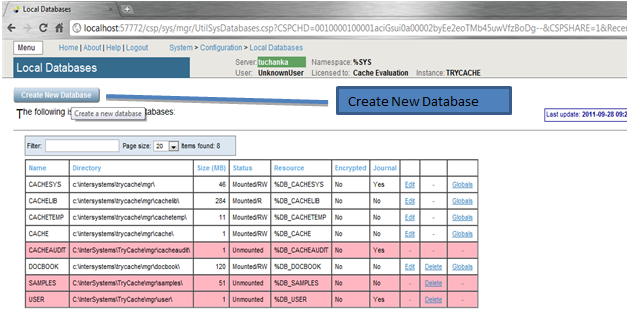
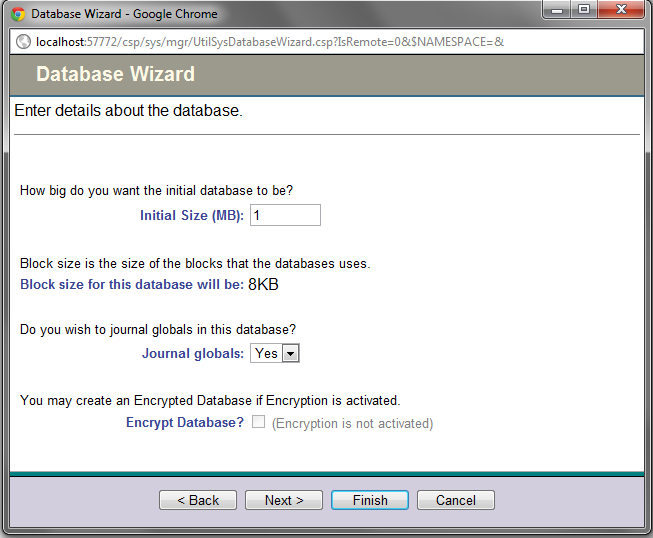
This resulting page contains the list of all of the local databases. All of the selections shown were created automatically during the installation of Caché. Create a new database by clicking on the "Create New Database" button. This will bring up a wizard.
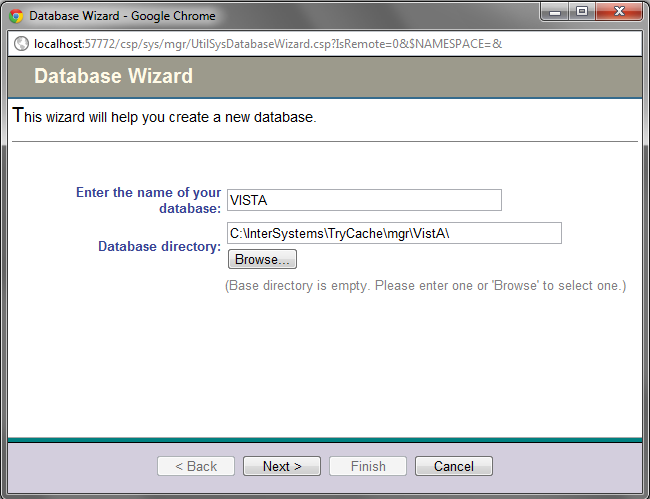
Set the directory entry to the folder that you created and set the database name. We recommend using the same name as the folder, but this is not necessary. When satisfied, select "Next" to proceed.
It is not necessary to change any of the default settings to enable testing and we recommend simply hitting Finish to proceed. However, if there are known required settings for the current site, these settings can be modified.
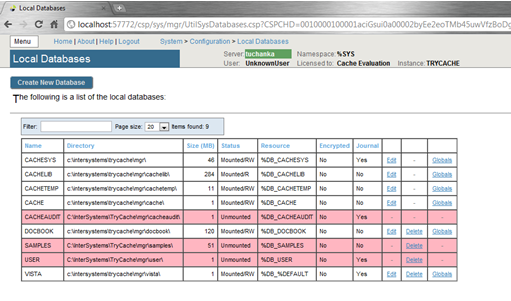
Verify that the newly created database appears in the database listing.
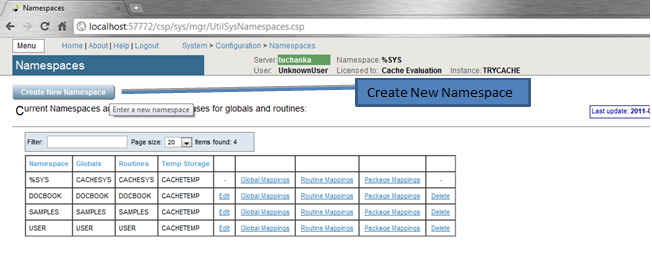
We now will configure the namespace for the newly created database. Navigate back to the System Configuration menu, click on the Namespaces option.
Then, click on the "Create New Namespace" button to open a wizard.
In the wizard, enter the name of the namespace and then select the database created above. Be certain to name the Namespace the same as the folder created above. Click on "Save" to finish the Namespace creation and to return to the namespace listing.
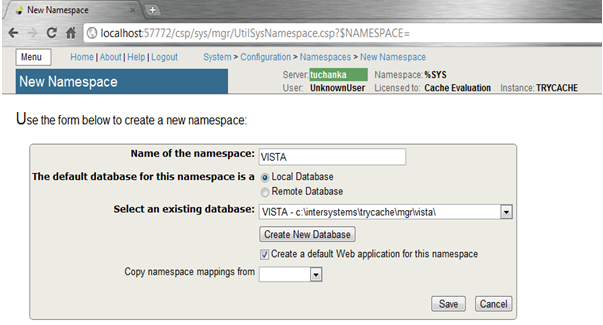
Verify that the new namespace is now in the list of current namespaces.
The next steps will be configuring the global and routine mappings, both of which are accessed from this page. We will focus on the global mapping first.

To create the new mapping, click on New Global Mapping. This opens another configuration wizard.
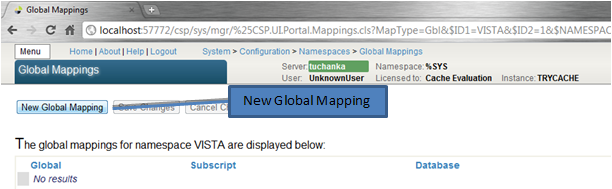
First set the Global Database location to the VistA database name, and for the Global Name enter "%Z*". This will map all globals that start with "%Z" away from the %SYS namespace to the VistA namespace. Click OK and the wizard will exit and display the new mapping in the window. Repeat this for %ut and %Serenj*
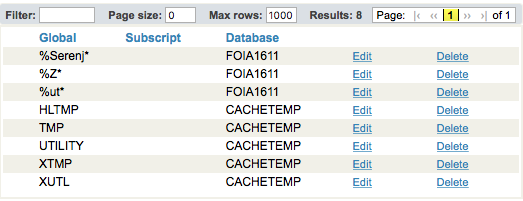
Repeat this for the following, but with different settings: The global database location is "CACHETEMP", and the Global Names are the following:
HLTMP TMP UTILITY XTMP XUTL |
This is necessary to do to speed the performance of any temporary globals which are very frequently used. The CACHETEMP database is memory mapped for speed.
In the end, you should have these mappings set-up:
| Global | Mapped Location |
|---|---|
| %Z* | <VISTA DB NAMESPACE> |
| %ut | <VISTA DB NAMESPACE> |
| %Serenj* | <VISTA DB NAMESPACE> |
| HLTMP | CACHETEMP |
| TMP | CACHETEMP |
| UTILITY | CACHETEMP |
| XTMP | CACHETEMP |
| XUTL | CACHETEMP |
Be sure to click on Save Changes before navigating back to the Namespaces page. This is what you will see. (Your database name may differ.)
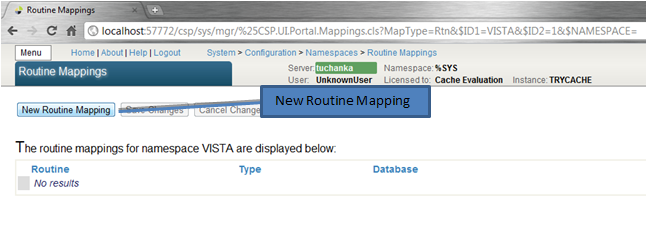
The final step before Caché is ready for the import is to map the routines. From within the Namespaces menu in the Management Portal, click on the Routine Mappings link.
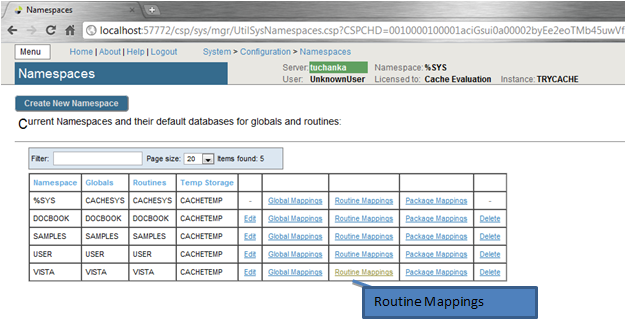
This page will list the current routine mappings for the VistA namespace. Much like the globals, there are no current mappings. Click on the New Routine Mapping button to bring up the routine mapping wizard.
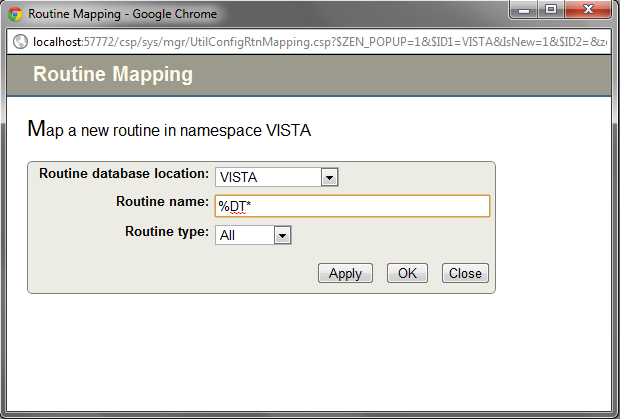
Again select the database location that corresponds to the VistA database, enter "%DT*" into the Routine name, and click Apply. This adds the first namespace mapping to the VistA database.
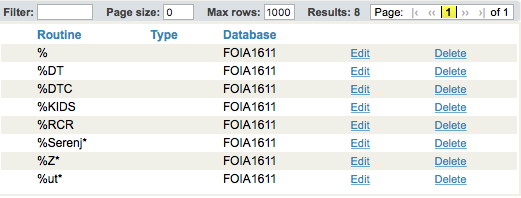
There are 7 other mappings that need to be entered in the same manner. You should have these mappings in the end:
%DT* %RCR %XUCI %Z* % %KIDS %ut* %Serenj* |
After the final mapping is set, click OK to be sent back to the Routine Mapping page. You should now see the seven mappings listed on the page. Click on the Save Changes button (following screen shot is an example but is NOT ACCURATE).
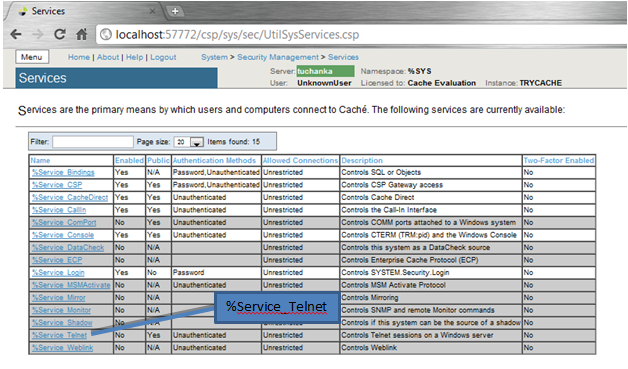
The final step of preparing the Caché installation for testing is to set the instance to allow TELNET service. The evaluation version of Cache won't let you do this; so this is only for licensed versions. This is done though the System Administration > Security > Services menu.
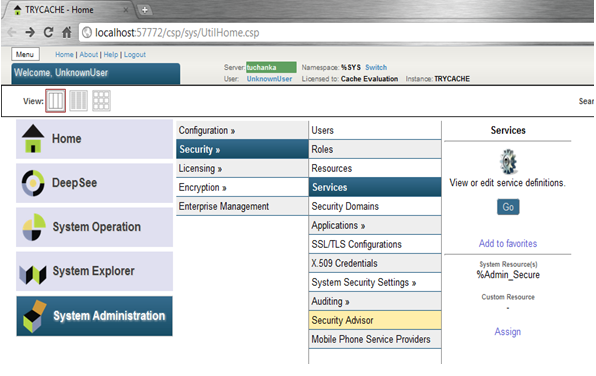
Click on Go to be brought to the menu which lists all services that are supported by Caché. Near the bottom of the list you will see the "%Service_Telnet" listing.
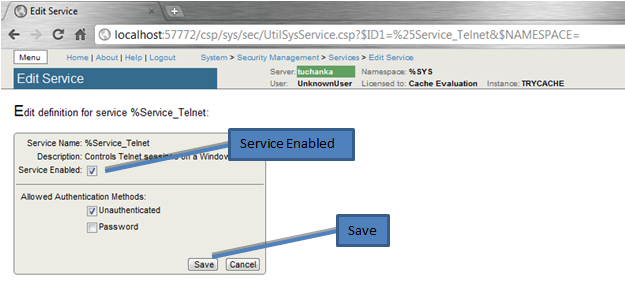
Click on the link to bring up the "Edit Service" page.
To enable the Telnet session, simply check the box next to "Service Enabled" and then click "Save".
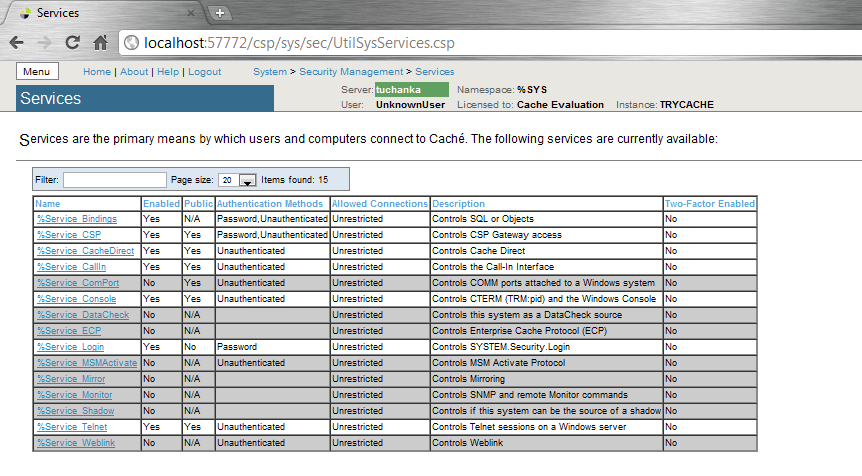
After saving, the Services menu will now show that the Telnet service is enabled.
Download the CACHE.DAT from http://foia-vista.osehra.org/DBA_VistA_FOIA_System_Files/.
The first step in installing the CACHE.DAT is to stop the Caché instance so that the instance will not clobber a process during the copy.
Right click on the Caché Cube in the taskbar
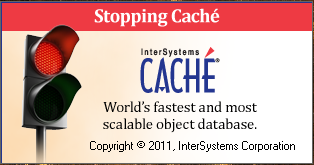
and select "Stop Caché". This will pop up a window for confirmation.
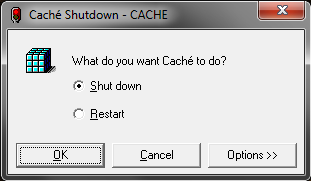
Select "Shut down" and click "OK". A status window will appear while the shutdown is happening. It will disappear and the taskbar Caché Cube will turn gray when the instance is down.
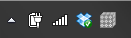
Caché Cube has turned gray as the instance has been shut down.
On macOS and Linux, you should run ccontrol list to find your instance name, and then ccontrol stop <instance name>.
At this point, you can take your downloaded CACHE.DAT and copy it into the directory that has been set up in Caché for VistA. If you followed the above, it will be "C:/Intersystems/TryCache/mgr/VistA". Your directory will differ for macOS and Linux.
All that is left is to restart the Caché instance. Right-click on the grayed-out Caché Cube and click "Start Caché". A status window will pop up to signify the instance is starting up.
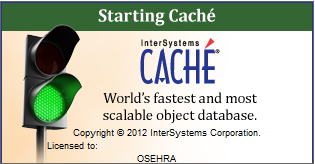
When it disappears and the Caché Cube is blue, the instance is ready for use again.
On macOS and Linux, run ccontrol start <instance name> to start it back up.
At this point, you are ready to continue to Initialize Vista.